Why do you need Ring Spotlight Cam installation and setup guide? Day or night, rain or shine, Spotlight Cam Wired has you covered. Get alerts when motion is detected. See, hear and speak to people on your property. And protect your home with lights and sirens. All from your phone, tablet and PC. Get even more out of all your Ring doorbells and cameras with Ring Protect, a comprehensive service that lets you review what you missed. See, save, and share videos and photos when you activate video recording and photo capture for $3/month per device or $10/month per household. It Includes Lifetime Theft Protection. If your Camera gets stolen, Ring will replace it for free.
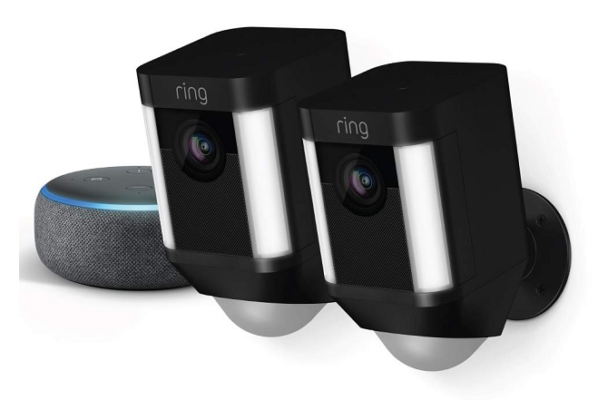
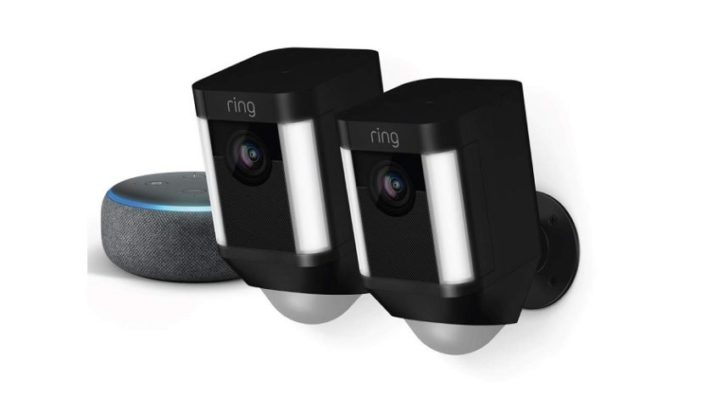
Ring Spotlight Cam vs Floodlight Cam
| Spotlight Cam Battery | Spotlight Cam Wired | Floodlight Cam | |
| Power Source | Rechargeable Battery Pack | Standard Power Outlet | Hardwired to Electrical Boxes |
| Recommended Use | Homes without Outdoor Power Sources | Homes with Outdoor Power Sources | Homes with Outdoor Electrical Boxes |
| Field of View | 140° horizontal, 78° vertical | 140° horizontal, 78° vertical | 140° horizontal, 78° vertical |
| Brightness | 300 Lumens | 375 Lumens | 1,800 Lumens |
| Average Install Time | 5-10 Minutes | 10-15 Minutes | 15-25 Minutes |
| Dimensions | 4.9″ x 2.7″ x 2.9″ | 4.9″ x 2.7″ x 2.9″ | 11″ x 8.2″ x 7″ |
| 1080p HD Video With Live View | Yes | Yes | Yes |
| Remote-Activated Siren | Yes | Yes | Yes |
| Two-Way Talk | Yes | Yes | Yes |
| Motion-Activated Alerts | Yes | Yes | Yes |
| Advanced Motion Detection | Yes | Yes | Yes |
| Works With Ring Solar Panel | Yes |
How to do Ring Spotlight Cam Wired Installation?
It is easy to do Ring Spotlight Cam Wired Installation. Find below our step by step guidelines/
Step 1 – Connect Spotlight Cam with Ring App
First set it up your Ring App with Spotlight Cam before going to mount or installation. It is important to do so as you may find it difficult if you wish to do after mounting.
Step 2 – Choose a right place
Spotlight Cam is designed to be placed at an optimum height of nine feet with the motion detector parallel to the ground. This will put the motion sensor in a perfect position to detect human-sized objects at up to 30 feet. For better visibility of object, please maintain this height.
Step 3 – Let mount the bracket
Turn the mounting bracket Once you’ve selected your spot, so that the word “Up” is facing you. Use the built-in level to make sure Spotlight Cam is even before using the bracket to mark your holes.
If installing on a wood surface, use the install screws to screw the mounting bracket directly into your wall. If installing on a masonry surface like stucco or brick, use the provided drill bit to make your holes, then insert wall anchors before installing the screws.
Step 4 – Install the Spotlight Cam
After installing your bracket, align the 4 screws on the base of Spotlight Cam with the small holes on the mounting bracket and push down into the slots, securely locking it. Use the Phillips end of the screwdriver bit to tighten the security screw on the right until Spotlight Cam is secure.
Step 5 – Connect the Cable
Use provided cable clips to secure the 20-foot power cable to your mounting surface. Once again, use the provided drill bit if installing on a masonry surface. Then, insert the wall anchors before installing the screws. If installing on a wood surface, you can screw the cable clips directly into your wall. Feel free to paint the cable to match your wall, as well.
Step 6 – Adjust the camera
If Spotlight Cam isn’t plugged in yet, go ahead and do so now. Wait a minute for Spotlight Cam to power up and come back online. Using the live feed on your phone, position Spotlight Cam to your desired view. Once you are happy, tighten the security screw on the right side to fix Spotlight Cam in position.
What are the Ring Spotlight Cam Battery Installation process?
Installation process of Ring Spotlight Cam Battery is very easy and simple. Here are the helpful steps for Ring Spotlight Cam Battery Installation.
Step 1 – Charge until green light illuminate
Both the red and green lights on top of the battery will illuminate while charging, but only the green light will be lit once fully charged. The included battery needs to be charged by using the included orange USB cable, before installing your Spotlight Cam,.
Step 2 – Place battery into the Spotlight Cam
Follow these steps to insert the battery into your Spotlight Cam:
- Press the white button to open the battery compartment on your Spotlight Cam.
- Push the battery into the compartment until it clicks into place.
- Firmly close the battery compartment door
- Note: It may take a bit of pressure to completely close the compartment door. Be sure to push on it until you hear the click that indicates the compartment is closed.
Step 3 – Connect the Ring App with Spotlight Cam
It is important to connect Ring App with Spotlight Cam before physically installing your Spotlight Cam to avoid hassle after mounting the camera. You find this below link helpful for app installation.
Click here to learn how to do the in-app setup.
Step 4 – Select a place with appropriate height for camera
Select a location to install your Spotlight Cam. It’s important when selecting a location to remember that Spotlight Cam is designed to be placed at an optimum height of nine feet with the motion detector parallel to the ground. This will put the motion sensor in a perfect position to detect human-sized objects at up to 30 feet.
Step 5 – Choose a direction for mounting
To mount on an overhang, insert the mounting plate with the ball socket pointing up. To mount Spotlight Cam on a wall, insert the mounting plate with the ball socket pointing down. Spotlight Cam comes with a mounting plate that, depending on its orientation, allows you to mount it on a wall or under an overhang.
If you need to change the direction of your mounting plate:
- Press the button on the back of the unit to open the battery compartment.
- Remove the security screw and weather seal.
- Press the release button and slide the mounting plate out.
- Insert the mounting plate in the direction you want.
- Tighten the security screw.
- Insert the weather seal in the unused hole.
Step 6 – Attach mounting bracket with screws
If installing on a masonry surface like stucco or brick, use the provided drill bit to make your holes, then insert wall anchors before installing the screws. If installing on a wood surface, use the install screws to screw the mounting bracket directly into your wall.
Note that the “arm” of the mounting bracket can face either up or down, so experiment until you find what you like best. Use the bracket to mark your holes.
Step 7 – Mount the Spotlight Cam
After installing your bracket, remove the security screw and push the ball on the back of Spotlight Cam into the socket until it pops into place. Position the camera with the motion detector parallel to the ground.
Step 8- Choose right angel for camera
Using the live feed on your phone, position Spotlight Cam to your desired view. Once you are happy, tighten the security screw on the right side to fix Spotlight Cam in position.
Set up process for Ring Spotlight Cam Wired with Ring App
Find below useful tips to set up process for Ring Spotlight Cam Wired with Ring App
Step 1 – Ring App download : To download the Ring app:On your mobile device, go to the App Store (for iOS devices) or the Play Store (for Android devices).Search for “Ring.”Download and install the Ring app on your mobile device.Or visit ring.com/app on your mobile device.
Step 2 – Access Your Account: If this is your first Ring product, you will be asked to set up an account.To set up an account:Open the Ring app.Select “Create Account.”Follow the in-app instructions to create a new account.If you already have another Ring device installed, simply open the Ring app.
Step 3 – Click “Set Up a Device”Tap “Set Up a Device” then select “Security Cams.”
Step 4 – Scan the QR code or MAC ID barcode on your Ring device” The QR code or MAC ID can be found on the back of your Spotlight Cam.Point the camera on your smartphone at the QR code or MAC ID barcode on your Spotlight Cam.This code can also be found on the product packaging or on the Quick Start Guide that came with your device.Center the code in the phone camera’s view at the top of the screen.Once the code is recognized, a green square (for QR code) or a green line (MAC ID barcode) will appear, and the setup will proceed to the next step.
Step 5 – Select Your Location” If this is your first time setting up a Ring device, you will receive a request from your phone informing you that the Ring app wishes to use your phone’s location services to pinpoint your location. Allowing the app to do so will assist with inputting your address.Enter your address information into the app, then confirm it.If you have established a location previously, you can select it from the list of your locations.
Step 6 – Name Your Device: Select a specific name for your Spotlight Cam to distinguish it from other Ring devices on your account. You can choose one of the default names that are suggested, or you can enter your own by selecting “Custom…” at the bottom of the list.
Step 7 – Plug in Your Spotlight Cam: Plug your Spotlight Cam Wired into a power outlet near your wifi router. This helps ensure a good connection to your wifi network during setup.
Step 8 – Put your Spotlight Cam into Setup Mode: Press and release the button on the top of your Spotlight Cam. When the light on the bottom of your Spotlight Cam is blinking white, tap “Continue” in your Ring app.
Step 9 – Connect to Your Ring DeviceiOS: Tap “Join” when the Ring app asks to join the Ring wifi network.Android: Your device should automatically connect to the Ring wifi network.If your device does not automatically connect to the Ring wifi network, or if you chose to continue without scanning in step four, please follow the steps below:Press the home button on your phone to leave the Ring app.Navigate to the Settings app, then tap wifi.On Android, you may need to navigate to Connection then wifi.Select the Ring wifi network from the list of available networks. The network will appear as either:Ring- followed by the last six digits of the MAC ID.Ring Setup followed by the last two digits of the MAC ID.Once connected, close your “Settings” app and return to the Ring app.
Step 10 – Connect Your Spotlight Cam to Your Wifi: Be sure you have your wifi password ready.Select your wifi networkIf you have more than one wifi network, select the network closest to where you will be installing your Spotlight Cam.Enter your wifi password and press Continue.Note: After connecting to your wifi network, your Spotlight Cam may update its internal software. While performing an update, the light on the bottom of your device will flash white. When the white light stops flashing, you can tap “Continue” in the Ring app and begin using your Spotlight Cam.
Step 11 – Test Your Device: Once your Spotlight Cam has completed its update and setup, configure your Spotlight Cam’s motion zones, then open Live View to test your camera.