Reolink offers two versions of it’s standalone NVR: the 8-channel RLN8-410 reviewed here and the and the 16-channel RLN16-410. The company also offers a few different models packaged with cameras as complete NVR kits, though specs and features may vary from those in this Reolink PoE NVR review.
Package content – Reolink PoE NVR
- 8-channel PoE NVR with power adaptor – can also be purchased separately as the RLN8-410
- 4 x RLC-410 4MP PoE IP Camera
- HDMI Cable
- 1 metrenetwork cable for connecting the NVR to your router
- 4 x 18 metre network cable for connecting the 4 cameras to the NVR
- USB Mouse
- CD with manual and software
- Quick start guide
- 5 x Mounting hole template, screws
- 4 x surveillance warning sticker and waterproof connector
Technical Specifications – Reolink PoE NVR review
| Spec | Details |
|---|---|
| NVR | |
| Channels | 8 channels |
| Decoding resolution | 4MP/3MP/1080P/720P |
| Playback resolution | 4MP/3MP/1080P/720P |
| Synchronous layback | 4 channels |
| Storage included | 1 x 2TB HDD |
| Maximum capacity | 4TB |
| External HDD | 1 x e-Sata (4TB max) |
| USB | 2 x USB 2.0 |
| Protocols | TCP/IP, HTTP, uPNP, SMTP, NTP, DHCP, DNS, FTP |
| Alarm in / out | |
| Audio in / out | Supports camera’s on-board microphone only |
| Power consumption | <10W without HDD & PoE |
| Camera (RLC-410) | |
| Resolution | 2560 x 1440 |
| Sensor | 1/3″ 4MP |
| Focus | Fixed |
| Focal length | 4mm |
| IR distance | 30 Metres (36pcs Ring LED) |
| Angle of View | 80°@4.0mm |
| Onvif | V2.1 compatible |
| Power Consumption | 5.5W |
| Working Environment | Temperature: -10 ℃ ~+55 ℃ (14°F~131°F), Humidity: 10%~90% |
| Network Protocol | TCP/IP, HTTP, HTTPS, uPNP, RTSP, SMTP, NTP, DHCP, DNS, FTP, ONVIF, URL, P2P |
| WiFi |
Reolink PoE NVR review
Design
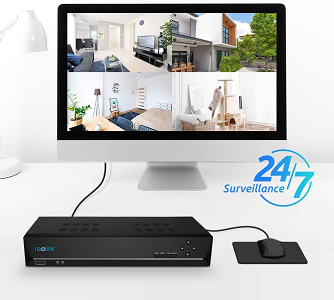
The NVR measures 10.91 x 3.82 x 3.82 inches—about the size of a standard cable box—and it houses a 2TB hard drive. The front control panel features a handful of navigational buttons, though you’ll undoubtedly perform most of these functions through the on-screen interface using the supplied two-button mouse. Along the bottom is a single USB port.
Dimension & weight
| Dimensions | 16.14 x 14.57 x 11.81 inches |
|---|---|
| Item Weight | 4.4 pounds |
Back panel
The NVR’s back panel has the expected 8 PoE network ports, each with their own activity LEDs. Display ports present are a VGA port and an HDMI port (max 1080p). The second USB 2.0 port and an eSATA port are available for connecting an external hard disk. We recommend the eSATA port as it is much faster than USB 2.0, especially as the NVR is missing USB 3.0 ports. An analog audio out connection is available for audio output. The DC power plug completes the back panel.
Front panel
The front panel of the NVR sports a red power LED, a green HDD activity LED, a USB port and playback control buttons. There is also a button that lets you quickly change the view on an attached TV/monitor from a single channel to a quad-view of 4 channels.
Work with Reolink 5MP/4MP Cameras
This Reolink RLN16-410 16-channel PoE NVR supports both 5 megapixels and 4 megapixels resolutions. It works perfectly with all our 5MP/4MP PoE IP cameras for 24/7 recording, motion detections, live views, playback and more features.
Supported Reolink 5MP/4MP IP cameras include: RLC-410-5MP, RLC-520-5MP, RLC-423, RLC-410W, RLC-511, RLC-422 etc.
- The Reolink NVRs are designed for Reolink security cameras ONLY.
Send email alerts
The NVR can send email alerts for a variety of triggers including motion detection. It includes pre-configured settings for Gmail and Yahoo mail which is a great feature. It can send alerts to up to 3 different email addresses. You can either set the NVR to send one image per camera or just one image from the camera that detected motion. We recommend the former as it gives you a record of all activity around your home.
Motion detection
An important feature of any NVR is motion detection. The Reolink RLN8-410 supports basic motion detection – it compares a frame with the preceding frame to detect motion. This software-based motion detection is inferior to PIR-based motion detection. However you can adjust the sensitivity and detection areas for each camera to cut down false alerts such as insects and changing light levels due to clouds.
Weatherproof and playback
The NVR can record up to 8 IP camera streams at the same time. The kit comes with four RLC-410 IP cameras. The extra 4 channels gives you room to grow and expand to an 8 camera system if you need to. The RLN8-410 NVR can simultaneously play back up to 4 camera streams while recording up to 8 video streams at 4MP resolution. You can scrub through playback at 2x/4x/8x/16x speeds.
How to mount the IP camera?
- Use the supplied mounting template to drill the holes correctly. It needs 3 mounting screws, and an allen key is provided.
- Take care that you do not point the camera against the sun.
- Also remember that at night, the infrared light from the cameras can reflect off windows and cause glare.
- Take care that the majority of a camera’s scene is not the wall it is attached to. Excess IR reflection off the walls can be an issue at night. The camera will then reduce the scene brightness to compensate leaving you with darkness in the rest of the scene.
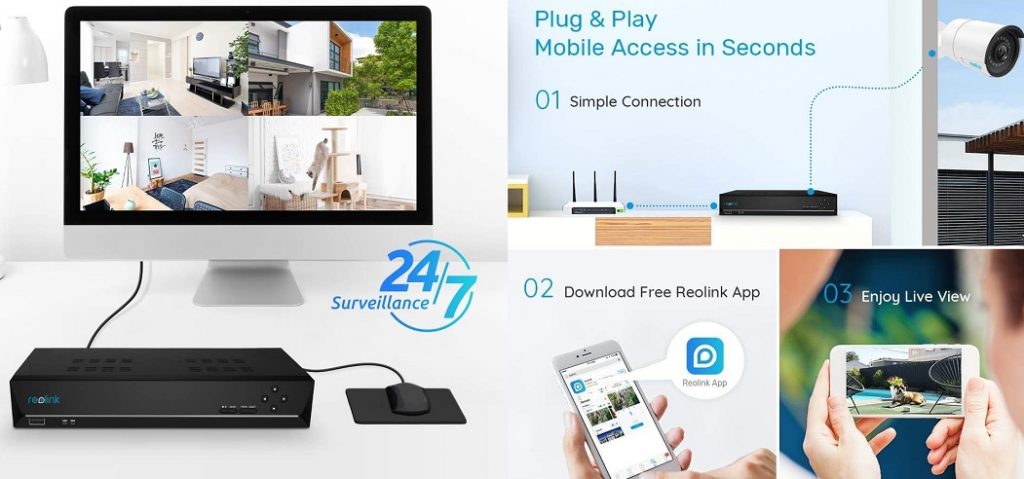
How to set up the Reolink PoE NVR?

The Reolink kit comes with a very good quick setup guide that shows you how to set up the NVR and connect the IP cameras. This is how setup goes:
- Connect the NVR
- First connect the NVR to a computer monitor or LCD via a VGA cable (the default resolution of the HDMI port is too low and so your TV will not show a picture, you can change it later).
- Then connect each of the IP cameras to the network ports on the NVR with the included 18 metre network cables. This is where the Power over Ethernet (PoE) feature comes in. Instead of having to use separate cables for power and data, PoE lets you use just the network cable.
- Connect the NVR to your router using the short ethernet cable provided.
- Connect the supplied USB mouse to one of the USB ports of the NVR.
- Finally plug in the power adaptor of the NVR.
- Power up the NVR
- There is a helpful setup wizard that will guide you through the initial setup.
- The default username is admin with no password – remember to change this!
- Make sure you can see the video streams of all 4 cameras in the live view section.
- Now change the output resolution to 1080p and connect the NVR to your TV using the HDMI cable.
- Install the Reolink mobile P2P app (optional)
- The Reolink mobile app is available from both the Play Store for Android and the Apple store for iPhones.
- When you start up the app, it should find your NVR.
- Next, set up a password. This should bring you to the live view screen.
The initial setup process through the NVR’s own user interface is quite straight forward and should get you up and running quickly. Any further setup (such as initializing the hard drive) and customization can be done via the NVR user interface using the USB mouse and virtual keyboard. But using the Reolink PC client software is much easier. The Reolink PC client software connects to the NVR and allows you to configure all the options.
Reolink PoE NVR Customer review
Awesome system.
I first bought the 8 camera system it was breeze to install. But it came with 4 cameras, which I thought “put one on each side of the house and that should be good”. Wrong. I had to buy 4 more cameras to go with it because it is so cool, I did 100% of the install all the way to making my own CAT6 cables. I bought a 500’ spoil, crispers and the connectors. It was easy to do. It’s time consuming to do a professional type install but well worth it. So once I used up my 8 ports, I decided I wanted more.
This 16 camera system was close to plug and play. You do have to set up the passwords and few other minor things but not a big deal. Worked just as perfect as the 8 camera system. One note to remember. The order in which you plug in the cameras will be the order they appear on the monitor. So,…if you want them grouped a certain way make sure you plug the into the NVR in that order.
The 8 camera system did not have an internal fan, but the 16 camera system does. So you will hear it depending on where you place it. I have mine behind a dresser in our master and with the 8 system it was undetectable. But now with the 16, a smart burglar might hear it and have. Presence of mind to take it with him. Maybe I’m giving a bad guy too much credit. If they were truly smart they wouldn’t be a criminal. So I keep a small fan running in the bedroom and it now covers the sound of the NVR fan.
One thing I wish REOLINK would do is add a fast forward search mode. You can run slow motion, but search has to be done with the slide bar at the bottom of the screen. You can slide it just a few minutes at a time and I’ve done this and been able to find what I’m search for. But how nice would it be to be able to fast forward 2X or 4X the speed. Also, to be noted once your all setup, 90% of your functions, adjustment, and changes can be done from a laptop with the downloadable free app like naming the camera, view, setting up alarms to email you, adjusting sensitivity, turning on audio…etc. Also, know that these are supper sensitive cameras.
The ones I have setup to email me when triggered I set the sensitivity between 1 & 5. They go up to like 50 which would never be needed. You’ll get false triggers when bugs fly in front of the cameras, but set the sensitivity low and set the area that triggers small and it’s not too bad. Like on the approach to my front door I only have one line of the grid active and anyone walking up to my door has to cross that area. Worked incredible. I also set up a special free gmail account to use solely for the NVR and it sends an email to that account when triggered.
I do wish it had a bigger HDD. If your recording audio and video on all of the 8 camera system you get about 5-6 days of solid recording. These are upgradable to I believe 6TB. I may do that later or you can even hook up an external with a SATA cable and I believe there is not limit size on that. Overall I love this system and the mobile app works flawlessly.
By Amazon reviewer